You know that moment when you fill a glass of water and it just... doesn't look right? Maybe there's a faint smell, or a slightly cloudy tint. Nine times out of ten, that's your water tank telling you it needs attention. And honestly, most of us ignore it until someone in the house gets a stomach bug or the water starts smelling like a swimming pool gone wrong.
If you've landed here wondering how to clean water tank at home, you're not alone - it's one of those chores everyone knows they should do but keeps putting off. I get it. It sounds messy and time-consuming. But once you break it down, it's really just draining, scrubbing, disinfecting, and refilling. No plumber required, no fancy equipment. Let's go through it properly.
Why Bother Cleaning the Tank in the First Place?
Here's the thing - a water tank isn't a sealed, sterile box. Even the best ones have small vents, slightly loose lids, or hairline gaps where dust, insects, and even the occasional lizard sneak in. Over months, this turns into a layer of sludge at the bottom and a slimy green film on the walls if sunlight gets in.
That buildup isn't just gross to think about. It can actually make people sick - think stomach upsets, skin irritation from bathing, and water that just tastes "off" no matter how much you boil or filter it. Plumbers will also tell you that sediment clogs taps and shortens the life of your fittings.
Most experts suggest cleaning a residential tank every 3 to 6 months. If your tank sits directly under the sun or you live somewhere dusty, lean toward the shorter end of that window.
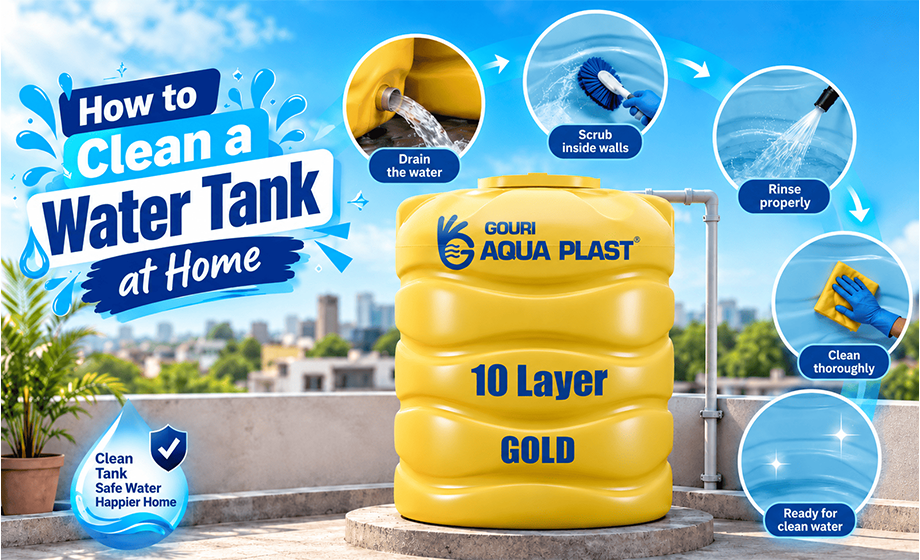
How to Clean Water Tank at Home in 8 Easy Steps
Okay, here's the part you actually came for. This is the process I'd genuinely recommend to a friend or neighbor asking how to clean water tank at home without calling in a professional service.
Step 1. Cut the supply and drain it out
Turn off the inlet valve so no fresh water sneaks in while you're working. Then open the drain valve and let gravity do its job. No drain valve? A small submersible pump or even a sturdy bucket will get the job done, just slower.
Step 2. Scoop out the muck at the bottom
Once it's empty, you'll almost always find a layer of sediment, sand, or rust-colored sludge sitting at the base. Use a plastic scoop or scraper here - skip metal tools, since they can scratch and weaken plastic tanks over time.
Step 3. Get scrubbing
Grab a stiff nylon brush and work on the inner walls, especially the corners and the base where grime loves to hide. If your tank gets any sunlight, expect a slippery, algae-coated surface - that's normal, just keep at it.
Step 4. Bring in a cleaning solution
A simple mix of water and a little chlorine bleach works fine for disinfecting. That said, a lot of households now just pick up a bottle of water tank cleaning liquid made specifically for this job - it's usually gentler on plastic and doesn't leave that sharp chemical smell behind.
Step 5. Let it sit, then rinse twice, not once
Give the solution 20 to 30 minutes to actually work before you rinse. And don't stop at one rinse; do it twice to make sure no chemical residue or taste is left behind.
Step 6. Don't forget the pipes
Inlet and outlet pipes collect their own share of grime. Flush them separately so you're not just pushing dirt straight back into your freshly cleaned tank.
Step 7. Check the lid before you close up
This step gets skipped constantly. Take a look at your water tank cover - is it cracked, warped, or not sitting flush anymore? A poor-fitting cover undoes half the work you just did, because it lets dust and sunlight right back in.
Step 8. Refill, then run the taps
Close everything up, refill the tank, and let your taps run for a couple of minutes before actually using the water. This clears out whatever loose particles are still sitting in the pipes.
Do this a couple of times a year and you'll rarely have to deal with the truly nasty, deep-clean situations. That's really the honest answer to how to clean water tank at home - consistency beats intensity.
Don't Underestimate the Water Tank Cover
A solid water tank cover isn't just a lid - it's your main defense against everything that makes tanks dirty in the first place: sunlight, dust, insects, leaves.
If yours has seen better days, replace it. It's a small cost compared to redoing a full deep clean every couple of months. Go for UV-resistant plastic with a snug, locking fit - cheap covers that don't seal properly are barely better than no cover at all.
Dealing With Algae: How to Remove Algae From Plastic Water Tank Walls
If you've ever opened a tank and seen a green, slippery coating along the sides, that's algae, and it thrives wherever sunlight sneaks in. So if you're specifically searching for how to remove algae from plastic water tank surfaces, here's what actually works.
Drain the tank, then scrub the affected areas with a mix of water and white vinegar, or a mild bleach solution if the growth is stubborn. Let it sit for about 15 minutes before scrubbing again - algae can be surprisingly clingy. Rinse well afterward. The real fix for the long run, though, is blocking sunlight completely: a proper opaque cover, or painting the outside of a translucent tank with a dark, UV-blocking coating, will stop algae from coming back so quickly.
Thinking of Replacing Instead? A Quick Word on 1000 Ltr Water Tank Price
Sometimes cleaning just isn't enough - an old tank with cracks or repeated contamination is a losing battle. If you're leaning toward buying new, the 1000-liter size is the sweet spot for most families. As of now, 1000 ltr water tank price typically falls somewhere between ₹4,000 and ₹9,000, depending on the brand and material - plastic, PVC, or stainless steel.
When you're comparing 1000 ltr water tank price across different sellers, don't just chase the lowest number. Check for UV protection and food-grade certification. Paying a bit more upfront often means fewer cleaning headaches and a tank that actually lasts.
A Few Safety Reminders
Wear gloves, and a mask if you're sensitive to fumes
Never mix bleach with other cleaning products - the fumes can genuinely be dangerous
Keep the area ventilated, especially with enclosed or underground tanks
Keep kids and pets well away while you're working
Frequently Asked Questions
How often should I actually clean my water tank?
Every 3 to 6 months is the general rule. If your tank is out in direct sun or near a construction site, cleaning every 2 to 3 months is safer.
Is water tank cleaning liquid better than plain bleach?
For most homes, yes. A dedicated water tank cleaning liquid is formulated to kill bacteria without the harsh smell or corrosion risk that comes with using too much bleach. Just follow the dilution instructions on the bottle and rinse well.
What's the easiest way to remove algae from plastic tanks without harsh chemicals?
Vinegar does a surprisingly good job on mild algae. For a lasting solution to how to remove algae from plastic water tank buildup, pair regular scrubbing with a sunlight-blocking cover - that combination stops regrowth almost entirely.
Do I really need a professional for this?
Not for a standard household tank. The steps above cover it. Professionals are more useful for large commercial tanks or extremely neglected ones with heavy sediment.
Does the tank's material change how often I should clean it?
A bit, yes. Plastic tanks are more prone to algae without a good cover. Concrete tanks tend to develop mineral buildup. Stainless steel tanks generally need the least frequent attention.
Conclusion
At the end of the day, learning how to clean water tank at home isn't complicated - it just takes a little effort every few months instead of a lot of effort once things get really bad. Drain it, scrub it, disinfect it, check that cover, and you're good to go.
And if you've been cleaning religiously but the water still isn't right, it might genuinely be time to look at a replacement rather than fighting an old, damaged tank forever. Either way, a little routine care goes a long way toward water that's actually safe to drink and bathe in.